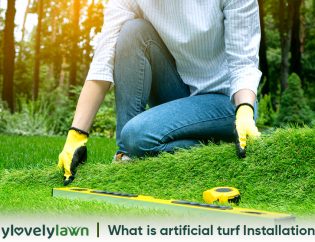
Artificial grass is highly versatile and can be installed on virtually any surface. However, the installation process is determined by the type of surface you are installing the astroturf.
Preparation of the surface area is the all-important step. The secret to laying a lovely lawn that will survive 10 to 20 years relies on the groundwork as much as choosing a premium-quality astroturf.
If you don’t nail the initial steps, you will almost certainly be facing costly repair fees.
In this article, we’re going to walk you through the process of laying artificial grass on soil.
Do you need an artificial grass underlay for soil?
It’s not necessary to install artificial grass underlay when you lay turf on soil, but you should install a sub-base.
The sub-base plays a central role in the long-term performance of fake grass. Speak with your artificial grass installer about which sub-base is the best option for your purposes or refer to our article: granite v sand.
Let’s crack on. Below are the steps you need to take to lay artificial grass on soil.
Step 1: Prepare The Surface
To lay fake grass on soil, the surface must be cleared of debris, weeds and plants then levelled out.
We recommend applying weed killer at least two weeks prior to starting the installation process. This will ensure the vegetation is destroyed down to the roots.
The next step is to remove the top soil so that you have space to install the sub-base. Three to four inches will suffice. This will also reduce the chances of loose seeds re-sprouting and creating ridges in your astroturf.
If it has rained overnight and the soil is still wet, wait until the soil is dried out. If there are soft, muddy patches, it can cause the soil to slump. Conversely, if the soil is hard and dry, water it slightly so it’s easier to dig into and remove.
Once the top soil is out, level it with a tamp. If your soil doesn’t drain water away so well, dig a slight gradient as this will help to improve drainage.
Do you need edging to lay astroturf on soil?
We recommend installing perimeter edging when laying fake grass on soil. Edging gives your lawn a tidy finish and gives you something to secure the artificial grass on to once it’s laid.
If you do decide to opt for an ornamental perimeter instead of fixing pins, install the edging once you have removed the top soil.
Step 2: Install a Weed Barrier
If you are installing astroturf on soil that previously housed plants, bushes or trees, you may want to consider installing a weed barrier.
Even though you have removed the top soil, there is still a possibility that weeds will grow underneath your new lawn and create lumps in the artificial grass.
A weed barrier is a heavy and tightly woven geotextile lining made from polypropylene. Weed membranes last around five years but are biodegradable so don’t need to be removed.
Weed membranes can be installed beneath the sub-base or on top of the sub-base. However, we don’t recommend them for pet-friendly artificial grass as they hold moisture and create unwanted smells of stale pet urine.
Step 3: Lay the Sub-Base
Laying the right sub-base and ensuring the surface is smooth is arguably the most essential step when laying artificial grass on soil.
In most cases, we recommend using a blend of MOT Type 1 and granite dust. This prevents the lawn from sagging and helps to improve drainage.
The other option is to use sharp sand. To determine which is the best option for you, refer to our article: Granite v Sand Sub-base.
Spread the sub-base over the surface area and level it with a spade or rake to create a compact and smooth finish.
If you expect the astroturf to be used frequently, it is essential that the sub-base is firm and level otherwise grooves and bumps will appear on the artificial grass.
This is particularly essential for commercial installations which will be used for sporting activities. Uneven surfaces can cause falls and injuries.
If the sub-base falls lower than the desired level, add more layers until you reach the height where the astroturf is plush with the perimeter.
Step Four: Installing the Artificial Grass
Before you lay artificial grass on soil, you need to cut the material to size using a sharp knife.
If you need more than one roll of artificial turf to cover your surface area, make sure the fibres are facing the same direction on both rolls otherwise your lawn will look untidy and unnatural.
We recommend laying the grass so the fibres are pointing towards the house so that you are looking into them. This angle creates a lush appearance and is aesthetically pleasing.
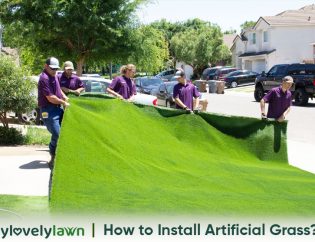
When you’re laying fake grass, be careful not to drag it across the surface otherwise you will disturb the sub-base. Artificial grass is delivered in rolls, so start from the nearest edge and roll outwards.
You will probably find artificial grass has kinks and ridges in it when you first lay it out. This is quite natural when astroturf has been bound in a roll. Don’t try to stamp kinks and wrinkles down, they will fall out naturally when exposed to sunlight in a couple hours or a few days.
Step Five: Joining the Grass
Once the astroturf is installed, you need to join the seams. Ideally, you will have the right tools for this. Speak with a professional artificial grass installer to make sure you purchase the correct type of glue and jointing tape.
To lay the jointing tape, pull back the edges of the fake grass by approximately 300mm. You will need to do this on both sides and unroll the jointing tape down the centre.
The shiny side of the jointing tape should be face down and the blotting side face up.
Fix the jointing tape at both ends with adhesive or a small nail. Replace the turf over the tape and bring the seam together. Ideally, there should be a 2-3mm gap between the two pieces of fabric to get a good seam.
Once you have the seam lined up, pull the grass back again and apply a bead of adhesive under the edge of one section using a mastic gun. Then do the same on the other side.
Bring the seam together ensuring there are no blades of grass caught in between the seam. Gently press down over the top of the seam with your fingers to help the adhesive spread out.
Step Six: Fasten the Edges
The best way to fasten the edges is to use landscaping pins or galvanised stakes between 4-6” long. Place the pins around 6” apart to securely fasten the artificial grass and flatten them with a hammer.
If you have flower beds adorning the side of your artificial lawn, we recommend folding the grass over the edges by about 50mm to secure the sides. Take this into account when measuring the strips.
To secure perimeter edges onto concrete, stone pathways or fencing, you a high powered staple gun or 3/8 screws.
Step Seven: Apply the Finishing Touches
For the best aesthetic result, we recommend adding an infill material when laying fake turf on soil. This helps the fibres stand upright and look natural.
Washed silica sand or plastic pellet infills are ideal to provide cushioning for bare feet and athletic activities. Plastic can get hot in scorching weather though so be careful not to burn your feet.
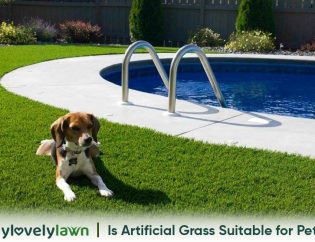
For artificial lawns designed for pets, we highly recommend adding zeolite. This soft, natural grain absorbs ammonia - the substance in urine that create that nasty smell of stale pee you want to avoid.
Once your infill material is down, brush the artificial grass with a broom or carpet rake to clear away dust and debris.
Finally, give your new lawn a quick hose down to help the infill settle. Leave the lawn overnight and examine the following day. If you notice thin patches of infill do not provide enough cushioning, top it up.
Call Experienced Professionals to Lay Artificial Grass on Soil
If you would like professional advice on how to lay artificial grass on soil feel free to contact our experienced artificial grass installers.
For customers that are not seasoned DIY experts, we recommend leaving it to experienced professionals to lay artificial grass on soil. To get the most value from your artificial lawn, the installation process is crucial.
Give us a call and speak with one of our friendly consultants today. We’re happy to help.
